Drupal 8 on Cloud9 IDE
“You see things; and you say, ‘Why?’ But I dream things that never were; and I say, ‘Why not?” — George Bernard Shaw
Drupal 8 will soon celebrate 1 year since its release. One interesting fact about this version of the popular PHP CMS is that the release cycles are smaller and feature-focused. This makes everybody happier than previous major versions and I will focus on developers’ experience. It’s been steadily improving since the focused adoption of popular and well-maintained projects from the wide PHP community. Composer, Drupal Console (an implementation of Symfony Console) and adopting PHP OOP design patterns in overall are some of the highlights in this article.
On the other hand, Cloud9 Editor is an interesting project to my personal experience as a developer. I’ve shared some enthusiasm about it before, summarizing some of my favorite features, and going deeper into debugging applications in the cloud. At this step, I start to dream about scenarios where this cloud editor will be THE editor for massive amount of open source contributors, experimenters and agile practitioners alike. I also visualize scenarios where it could fill in the gap in the hearts of many who use tools like dreditor. Dreditor on steroids: git, drush, mysql, php, etc — all the tools a developer needs to start, test, develop and deploy!
Repository based development environment
Drupal Composer’s drupal-project seems like a really interesting repository which can enable me to start a Drupal 8 project and make an installation. Also it will provide me with a door of opportunities to manage all my project-global dependencies via composer.
Here’s what I can do to start a Cloud9 workspace linked my own fork repository of the drupal-project.
- Forked the original repo to my profile.
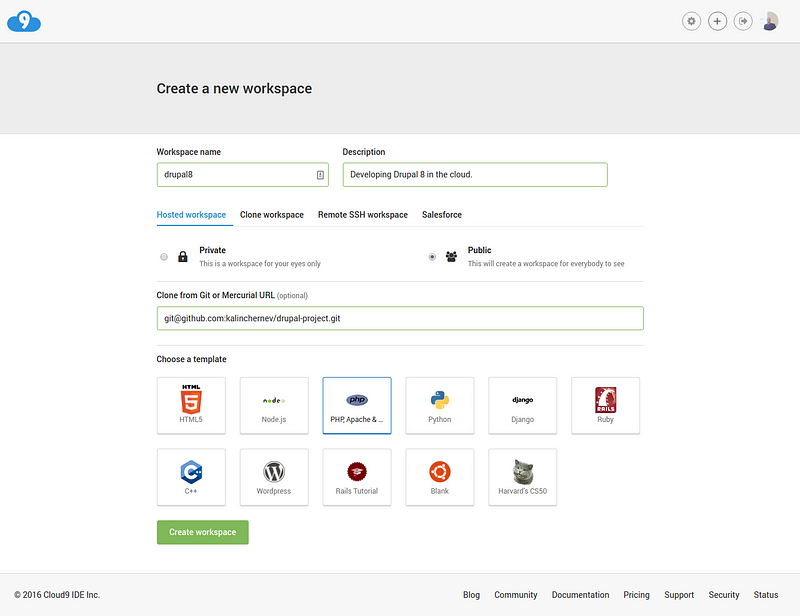
- Create a new workspace pointing to the my fork repo.
- Selecting template “The popular stack in shiny cloud wrappings: Apache, PHP5 and MySQL pre-configured” seems ok for the moment.
This should look similar to:
Creating my new development environment
At the end of this process, I have an Ubuntu-based docker container. In it, there is a local repository linked to my upstream repository on the origin. I’m ready to use the tools I know in Linux because composer, npm, node, etc. are already installed, and I also have a command line interface to run or install anything I need on top of this initial setup. As a side note, custom templates will soon make this initial setup even more flexible and personalized.
As the terminal is already open for you, run git remote -v to ensure this origin linking if you like.
Selecting Drupal 8
Now that the workspace is ready, you have to select a branch for the Drupal version you are going to work with. I’m going to do git checkout 8.x in the ternimal to use the 8.x version of the the repository files in the container machine. When you do that, you’ll see the files in the tree.
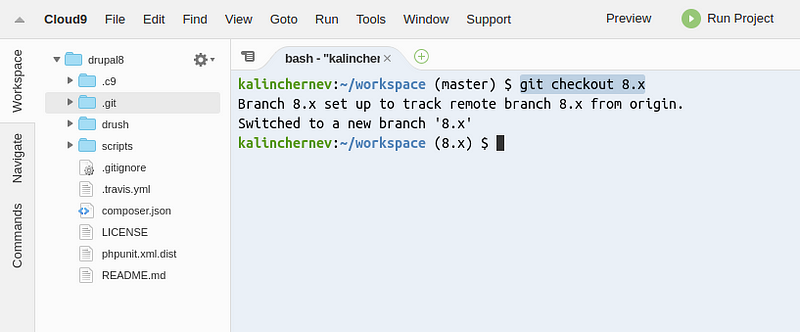
Drupal 8 branch of the repository
These are the source files I can use to build the project with the dependencies and the tools of my personal preference.
Building project dependencies
The dependencies can be managed globally for the project via the composer.json file. What interests me the most are the Drupal, Drupal Console and Drush which are already required.
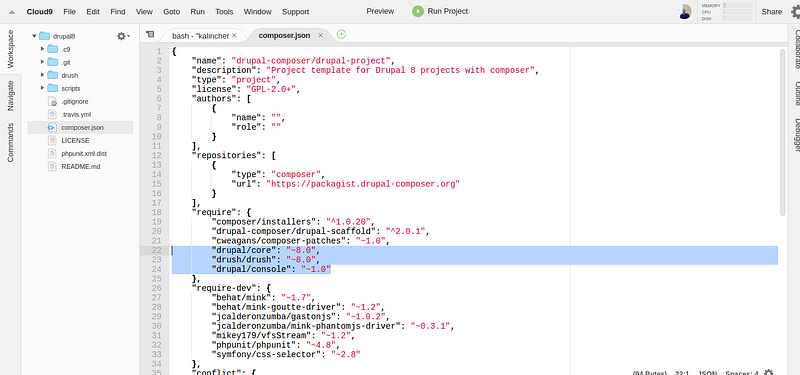
Drupal-specific initial dependencies.
As the readme file of the repo points out, additional dependencies can be added later by installing dependencies through the composer.
Run composer install in the terminal to download all the dependencies and run all the composer special things defined in the composer.json file.
When all downloads are finished — you can just run the Run button and start the apache server in the machine to open the project in the project browser or your own browser:
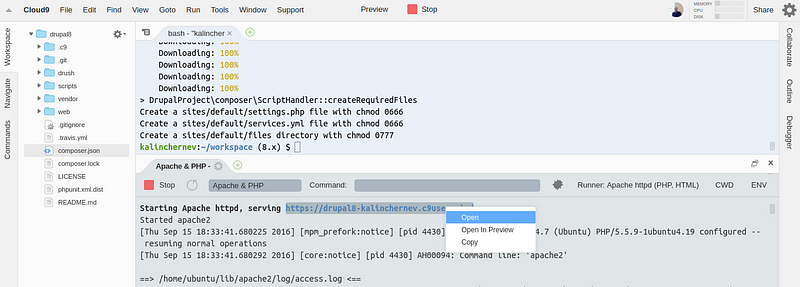
Open the project in the browser after the dependencies installation.
If you resist your perfectionist nature and expectations on domain names, now you can open the project at https://{projectname}-{username}.c9users.io/web/core/install.php replacing the variables of course. And there you go, you have Drupal 8 ready for your install!
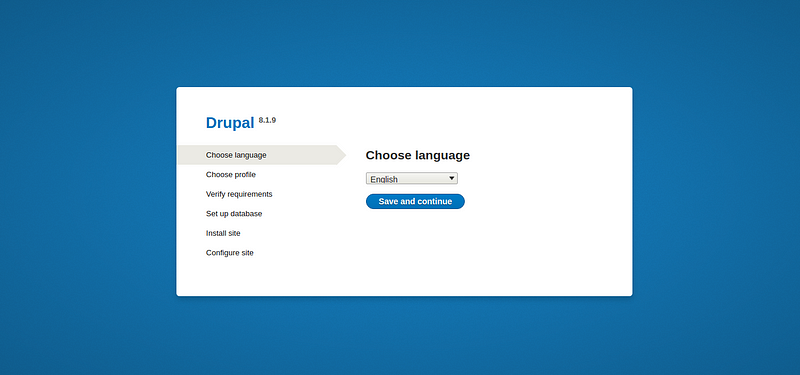
Yep, the wizard is ready!
Installing the project
I deliberately left this out from the previous one. You can, of course, continue with the installation in the most user-friendly way with the wizard above. Classical and easy and you don’t worry even for file permissions. If you are a databases guy, probably you’ll be interested to check the tutorial for setting up mysql and/or setting up a database.
Another option for making the installation is using the command line interface and Drupal Console. If you’re a non-idealist developer, you can directly run the binary from the vendor folder like /vendor/bin/drupal.
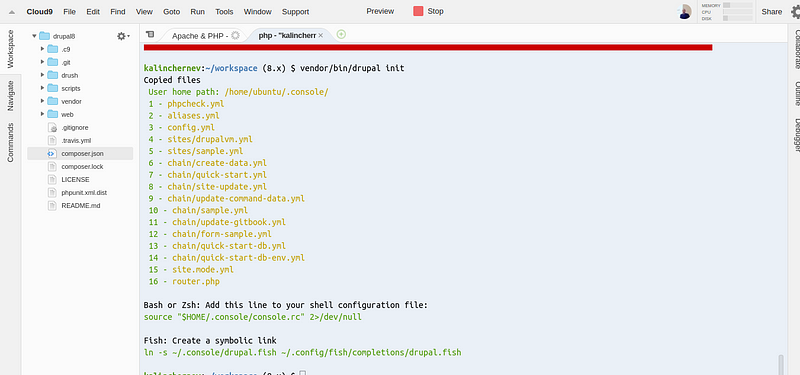
Drupal Console initialization
This will hint you to run an initial setup for the tool, just do it and then you can have vendor/bin/drupal site:install.
For more ideas around this installation step, check this tutorial which also includes steps to download the project if it was not done by Composer.
Shooting some ideas of a quick-start yml file for the [chain][29].
commands:
  # Install Drupal
  - command: site:install
    options:
      langcode: "en"
      db-type: "%{{db_type|mysql}}"
      db-host: "%{{db_host|127.0.0.1}}"
      db-name: "%{{db_name|c9}}"
      db-user: "%{{db_user|root}}"
      db-pass: "%{{db_pass|}}"
      db-port: "%{{db_port|3306}}"
      site-name: "Drupal 8 site"
      site-mail: "admin@example.org" # default email
      account-name: "admin" # default account
      account-mail: "admin@example.org" # default email
      account-pass: "admin" # default pass
    arguments:
      profile: "standard"
Debugging
A small helper subject after the setup — since xdebug is available in the docker in “Apache & PHP” runner, there is a way to debug apps.
- Start “Apache & PHP” runner with debugger on:

The green debugger button is the important detail to notice.
- Set a break-point and open the application to trigger a request:
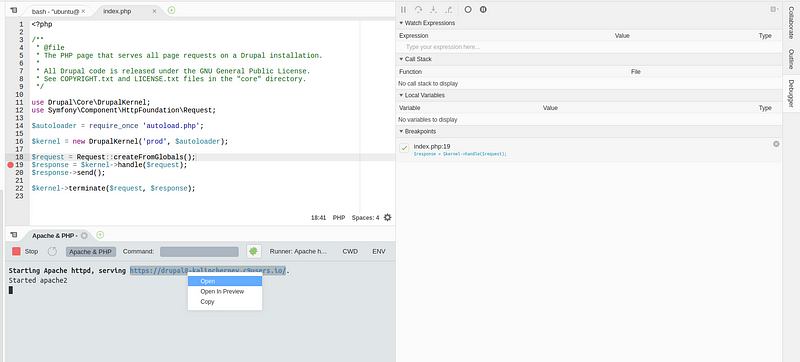
The app can be run either in preview in the IDE or in another tab.
- Inspect the state of the system and profit from deeper understanding :)
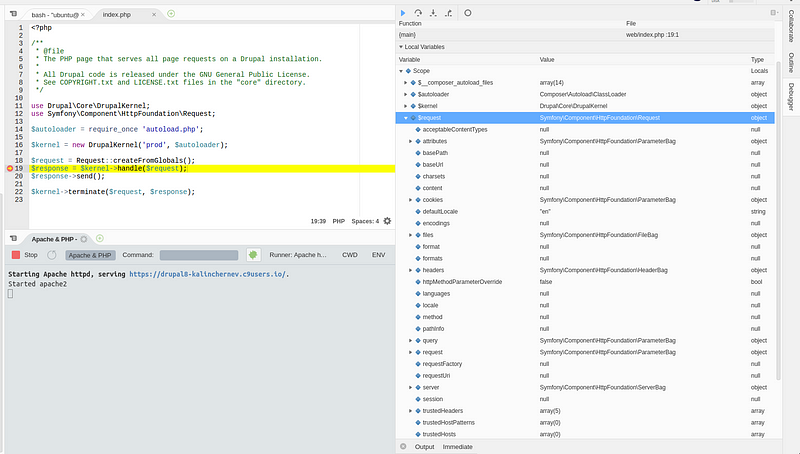
Use the inspector for observing both global and local scopes.
Note that the runner properties can be edited:

Runners are editable.
// This file overrides the built-in Apache httpd (PHP, HTML) runner
// For more information see http://docs.c9.io:8080/#!/api/run-method-run
{
  "cmd": [
    "run-apache2",
    "${debug?debug}"
  ],
  "cmdStop": [
    "run-apache2",
    "stop"
  ],
  "debugger": "xdebug",
  "debugport": 9000,
  "$debugDefaultState": false,
  "selector": "^.*\\.(php|phtml|html|shtml)$",
  "env": {
    "XDEBUG_CONFIG": "xdebug.remote_enable=1 idekey=cloud9ide remote_host=localhost remote_port=9000 remote_mode=req"
  },
  "info": "Starting Apache httpd, serving \\033[01;34m$hostname_path\\033[00m."
}
Conclusions
It’s an ambitious initiative/dream to work with Drupal 8 projects in the cloud but you see that it’s possible and easy. In the end of this tutorial you have a working instance built out of a composer-based dependency management system, your custom repository, and the vital tools to help you develop well: Drupal Console, Drush and any other script you can think of that run on an Ubuntu machine.
Now it’s up to you to use these tools to your best interest: teaching Drupal 8 interactively, pair-programming, triage issues by making/testing patches or just experimenting with features you’re interested in anywhere, anytime.